


Lowepro’s Workshop Tips
#6 Interior organization – Divider and organization best practices
Your Lowepro camera bag was built and designed to protect your camera gear through the toughest situations and the most challenging assignments. It is built not only to be useful and comfortable, but also to be durable so that it can last longer, reducing both our and your environmental impact.
That's why we have created Lowepro Workshop Tips, a series of guides on how to maintain, repair, and refresh the integrity and functionality of your camera bag, so it can have a longer life.
Your Lowepro bag is your companion on memorable adventures, and we want to preserve it not just for the memories, but also to reduce our environmental impact.
Best practices for organizing your gear in a Lowepro bag.
Consider weight distribution and access. Keep heavier things toward the vertical center of the pack and balanced side to side. With just camera gear this won’t be as critical because most camera gear has a similar density. For a mixed bag with lunch and some raingear it becomes more relevant. In both cases access is important.
#1 Larger Gear First:
Start with the largest piece of gear, in the example a 100-400mm f/2.8 on a Sony A9 with portrait grip.
Place this at the top center balance for easy access.
When traveling with a long lens we recommend detaching the body from the lens.

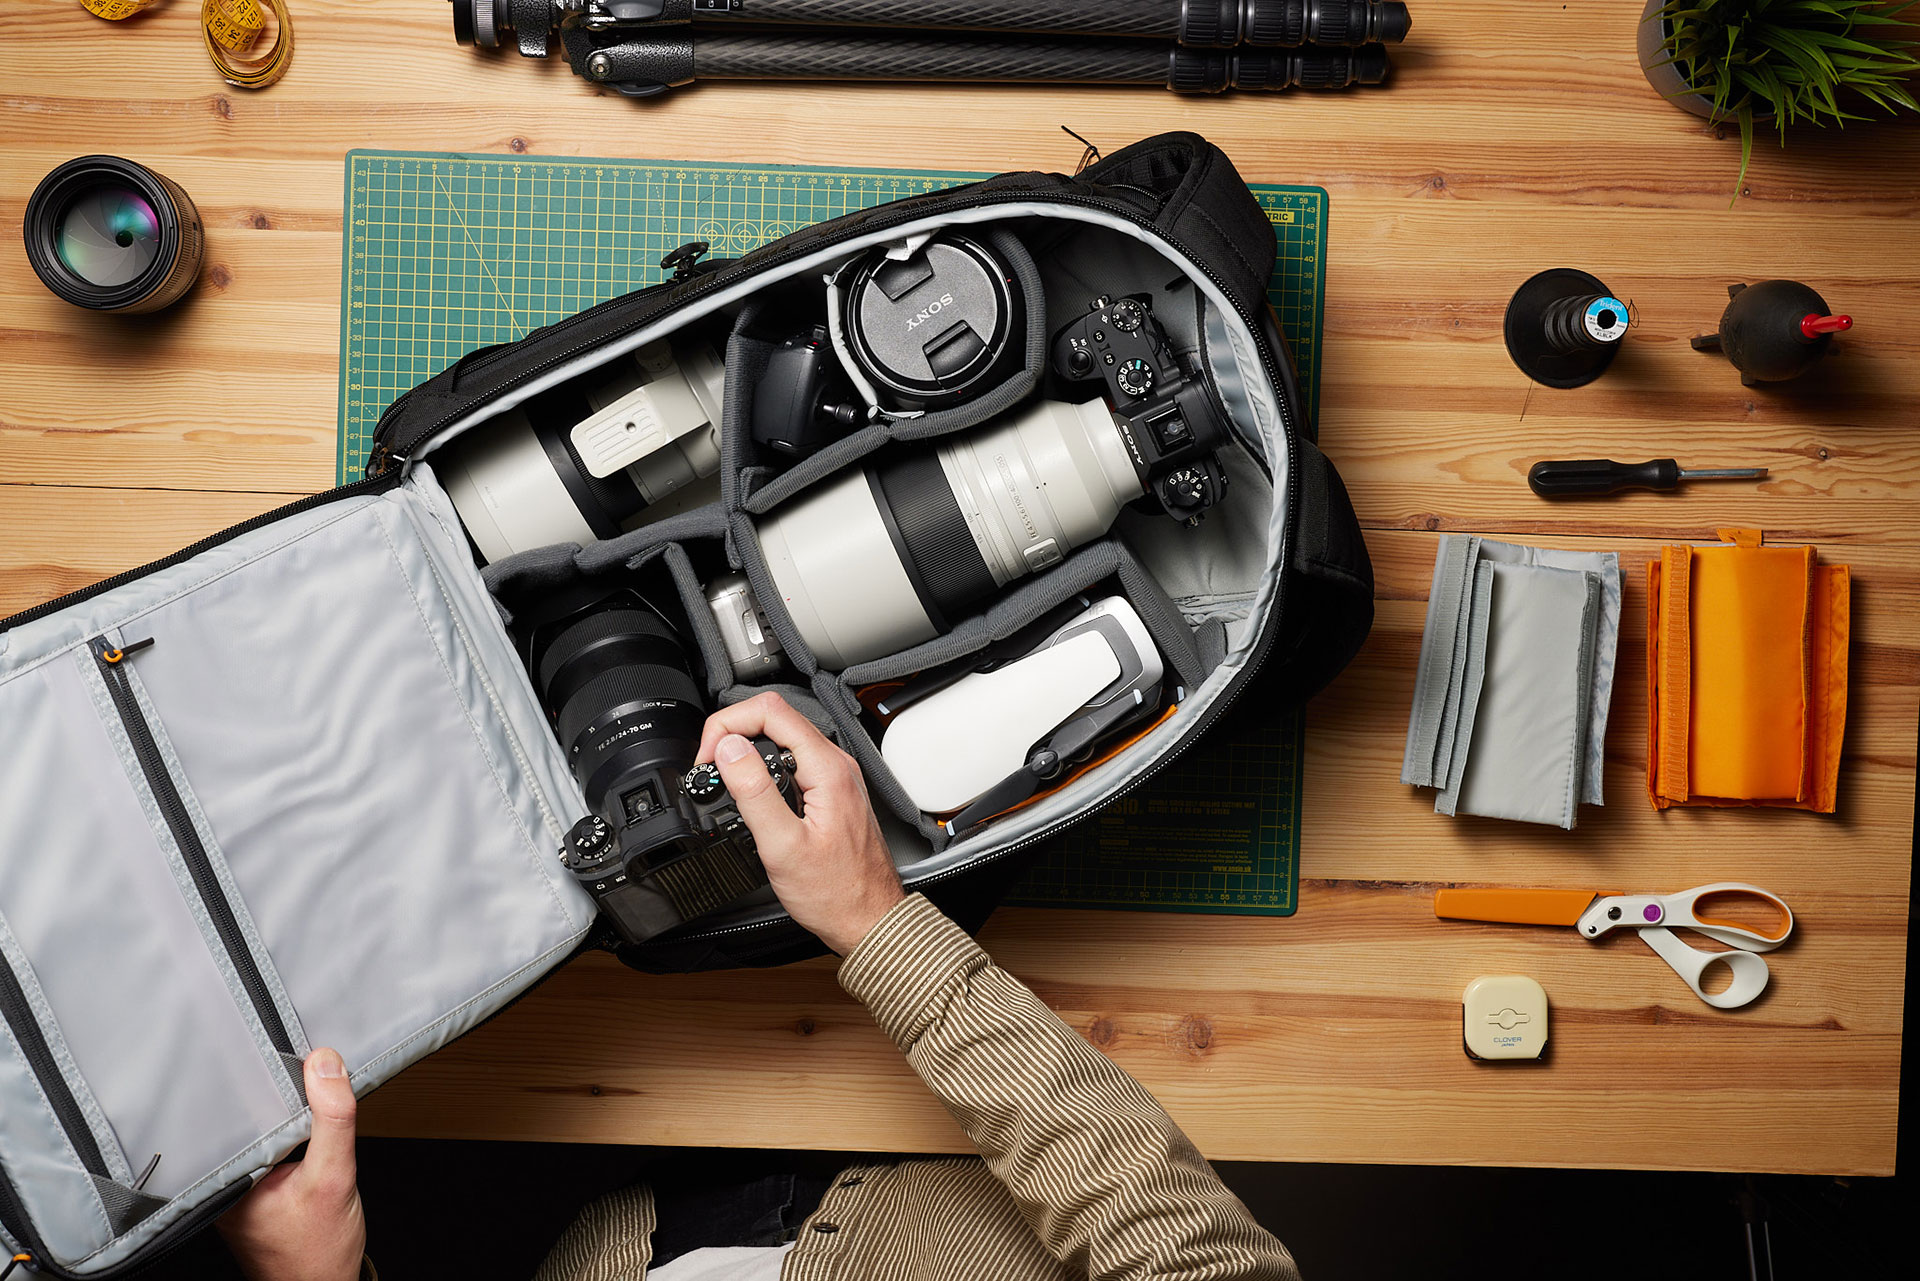
#2 Quick Access Equipment:
Next any other gear you want quick access too. Here a Sony A9 with a 24-70mm f/2.8 inside the left side door and 70-200mm f/2.8 lens inside the right side door.
#3 Divider Types:
Place dividers as you go. When you place dividers keep the hook tape wings pointed toward the top of the bag for best holding strength. Our dividers are color coded to guide their use.
- Dark grey – The sturdiest dividers, these provide structure to the layout.
- Light grey – “Normal dividers”, these are more flexible to around gear. Sometimes these are MaxFit dividers, which fit tighter to gear.
- Orange dividers – Special dividers like pocket or trapdoor dividers.
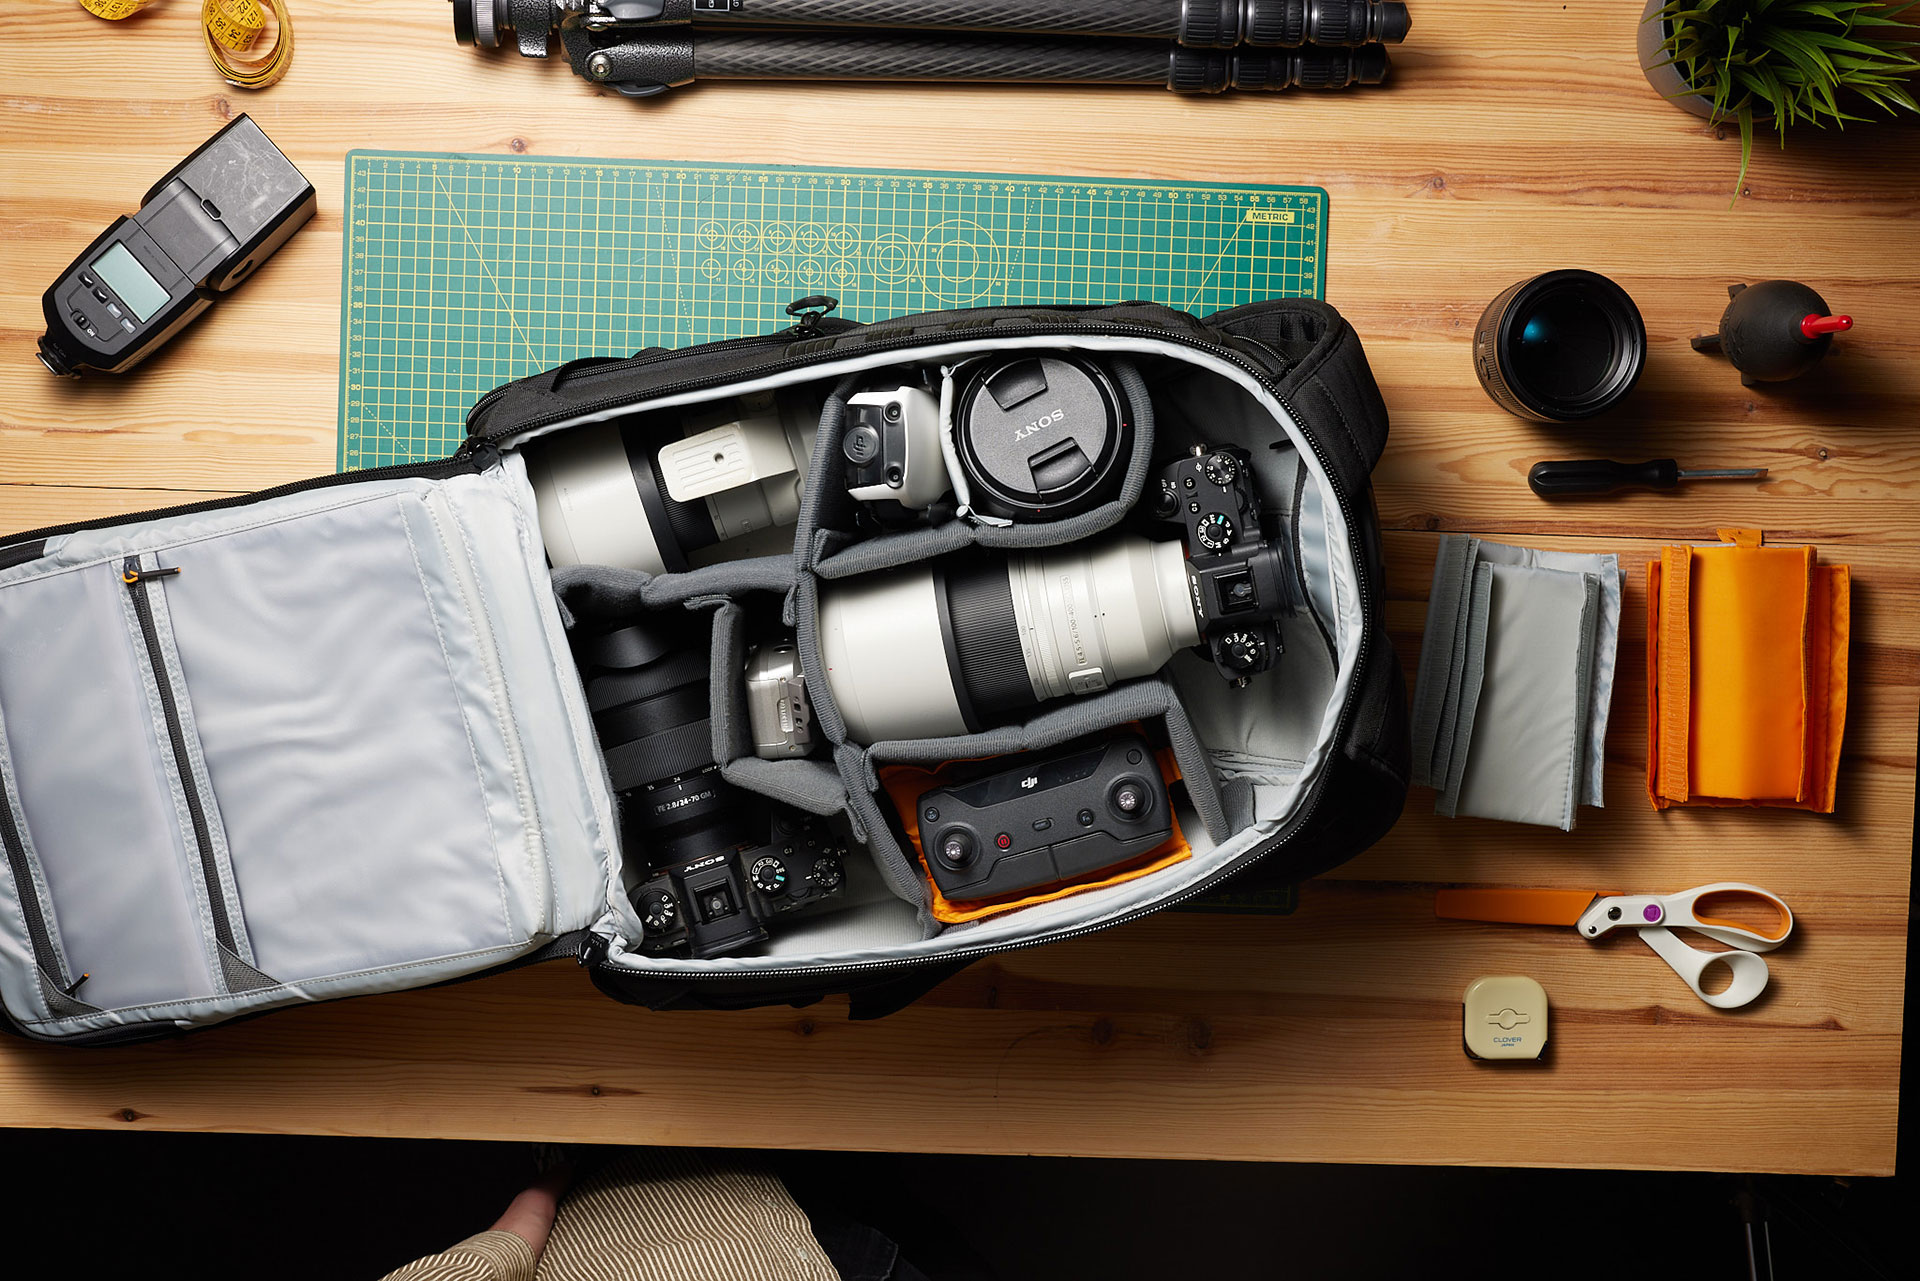
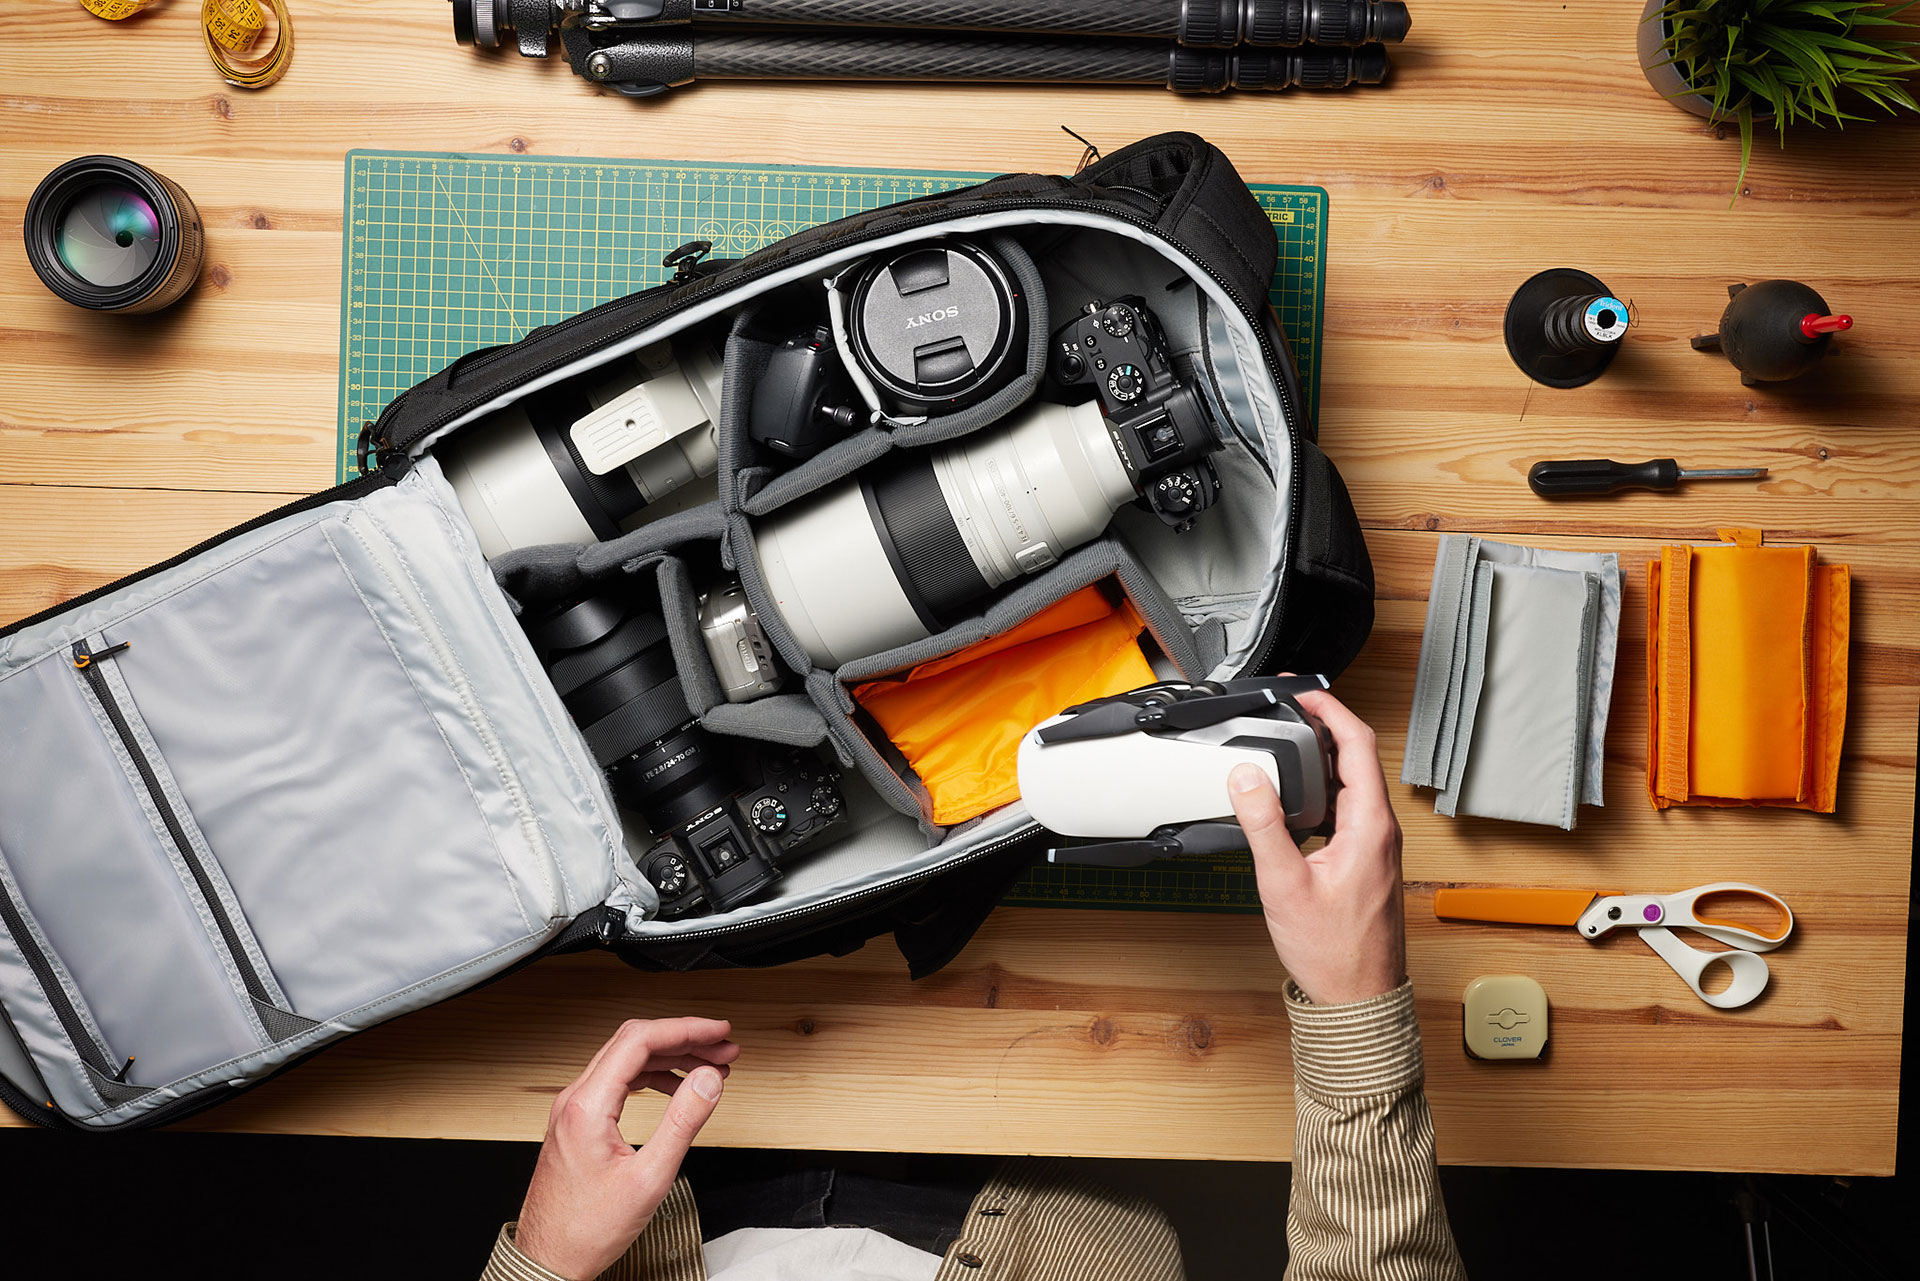
#4 More Gear:
Continue with other lenses and gear placing the biggest gear first.
For speedlights or a folding drone and controller use a trapdoor divider to stack them.
First put a speed light or drone in, then the trapdoor divider. On top of that place a second speedlight or the drone controller. These dividers are designed so that you can lift them from one end to get to gear below, and then fall back into place to make stacking gear a little smoother.
Extra Tips:
- If your bag doesn’t have a split between photo gear and other space you can use dividers to make an for food. For sandwiches or fruit, you can use a plastic container to keep them from getting smooshed, or leaking.
- Keep small accessories like filters and batteries in designated pockets or pouches.
When we make a bag we tend to err on the side of too many dividers, so you may have some left over. Depending on layout you can use these to further secure gear in place if you’re worried about it shifting.
On the other hand, if you need more dividers or you lose some you can buy extras from our shop (
,
).
As you go through different shoots your kit may vary. A great way to remember a good divider or gear layout for next time is to take a picture of it. If you want to show us your perfect layout we’d love to see it, you can tag us @loweprobags.
I hope this guide helps you organize your pack a little better,
good luck!